HP VUE provides the following to help organize and maintain the files and
directories you use:
- File Manager is an application for managing files and directories.
- The Desktop allows you to place any file or directory icon directly
on the workspace backdrop for easy access.
- Toolboxes are special File Manager views for managing applications and
other software available to you.
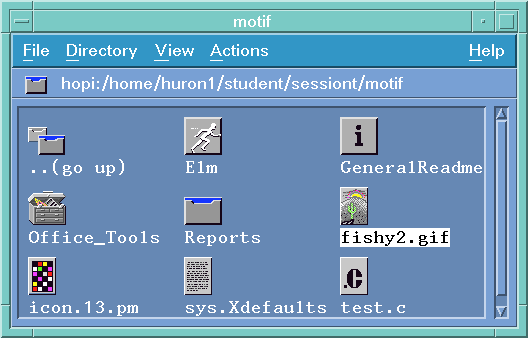
The HP VUE File Manager displays files and directories as icons. Using
a mouse, you can manipulate the icons directly by dragging and dropping them
into place. For example, to print a file, simply drop it on the printer in the
Front Panel.
File Manager associates a meaningful icon with each file and directory based on
its filetype. More importantly, actions associated with each
filetype define the desired behavior for the file or directory.
For instance, you might have a filetype that identifies document files. The
default action-performed by double-clicking the file's icon-would open the file
for editing. That is, the action saves you the trouble of remembering and typing
the command to start your word processor. The action automatically starts your
word processor and loads the file. Additional actions may provide shortcuts
to other frequent tasks, such as printing the document.
Any file, directory, or action that you access frequently can be placed directly
on the Desktop for quick access. The Desktop occupies the entire
backdrop in each workspace.
When you put an object on the Desktop, the original object is not altered. Each
Desktop object is really just a reference to the actual object that remains in
its original location.
You can leave objects on the Desktop as long as you want. Their locations are
remembered when you log out and restored when you log in again.
To display a pop up menu, you point to the object's icon, then press and hold
the right mouse button. The popup menu contains a few standard commands for each
object, but it also includes all of the available actions for the object.
When you no longer need an object on the Desktop, choose Remove From Desktop from
the object's popup menu.
Three groups of user can access files: owner, group, and other.
File access is divided into three functions: read permission, write
permission, and execute permission.
Who has access?
The three basic classes of users are:
- Owner-Usually the person who created the file.
- Group-Several users that have been grouped together by the system
administrator. For example, the members of a department might belong to the same
group.
- Other-All other users on the system.
What kind of access?
The access permissions on a file specify how that file can be accessed by the
owner, group, and other.
- Read Permission-Allows access to retrieve or view the contents
of the file or directory.
- Write Permission-Allows access to change the contents of the file or
directory.
- Execute Permission-For a file, allows access to run the file
(for executable files, scripts, and actions). For a directory, allows access to
run commands, scripts, and actions within that directory.
With File Manager, you can view and change the access permissions for any file
or directory.
To get started using File Manager, you need to learn a few basic skills:
- Selecting-Many commands operate on the "selected" file or directory.
- Dragging and Dropping- If you use a mouse, the easiest way to perform
many operations is to manipulate the icons with the mouse.
- Using Popup Menus-Each icon displayed by File Manager has its own
popup menu, including objects on the Desktop. Each popup menu provides shortcuts
to many common operations.
When you select an object, its name is highlighted. Many commands in File
Manager's menus apply to the selected object. In particular, the Actions
menu always contains the actions that can be performed on the selected file or
directory. If no icons are selected, the entire Actions menu (and some commands
in other menus) is inactive.
To select multiple objects, hold down Ctrl while selecting.
Or, Drag a box around the objects you want to select.
To deselect an object, select another one or click an empty area within the File
Manager window.
Reasons for selecting multiple objects.
- Deleting several files at once.
- Moving a group of files to a new directory.
- Putting several objects on the Desktop.
- Select the object's name, type the new name, then press Enter.
- Select the object, then press F1.
- Or, choose On Item from the Help menu, then click the object's icon.
- Double-click the object's icon.
- Or, select the object's icon, then choose a command from the Actions
menu that opens the file or directory. (The Action menu contains different
commands depending on the filetype of the selected object.)
- Or, choose a command from the objects popup menu.
Double-clicking an icon executes the objects default action, which is
always the first command in the Actions menu. For most data files, the default
action opens the file by starting the appropriate application and loading the file.
Directories have actions defined to open them (either in place, using the current
File Manager window, or in a new window).
- Point to the object's icon.
- Press and hold the middle or left mouse button.
- Drag the icon to the location where you want to drop it, then release the
mouse button.
To cancel a drag in progress, press Esc before releasing the mouse button.
If more than one icon is selected, you drag the entire group by dragging any of
the selected icons.
What dropping a file means
- If you drop an object into an open File Manager window or into a directory
icon, the file is moved to that directory.
- If you drop an object onto the workspace backdrop, it's placed on the Desktop
in the current workspace. (Actually, a Desktop object is really just a reference
to the real object, which remains in the File Manager view, unchanged.)
- If you drop a file on the Printer control in the Front Panel(or one of the
printers in the Printers subpanel), the file is printed.
- If you drop a file on the Personal Toolbox control in the Front Panel,
the object is copied into your Personal Toolbox.
- If you drop a file on the Trash control in the Front Panel, the object is
moved into the Trash Can.
- If you drop a file on an action icon, the action is invoked with the file as
a parameter.
If you attempt to drop the icon in a location that does not support dropped
objects, the icon snaps back to its original location in File Manager or on
the Desktop.
- Point to the icon whose popup menu you want to display.
- Press the right mouse-the "popup" button.
- To choose a command from the menu, drag to the command, then release,
Or, click the command.
The major identifying features of a file or directory are:
- Its name and location in the file hierarchy.
- Its owner permissions (properties).
- Whether or not it is linked to another file. A linked file is a representation
of another file. Linked files provide a way for you to have one file that appears
to exist in two or more directories.
- Choose New...
- From the File menu to create a new file.
- Or, from the Directory menu to create a new file or directory.
A dialog box prompts you for the name of the new file or directory.
- Enter the new name.
- Choose OK.
Other ways to create objects
- Copying an existing object, then rename it.
- Create a new file within an application. For example, if you use
Text Editor
to write a new text file, when you save it for the first time, a new file is created.
- Be sure the destination directory is visible (either as an icon or as an
open File Manager view).
- Drop the icon into its new directory.
- Be sure the destination directory is visible (either as an icon or as an
open File Manager view).
- Press and hold Ctrl while dragging the file's icon, then drop
the icon into the directory where you want the copy.
- Press and hold Shift while dragging the object's icon. When
you drop the icon into a new directory, a symbolic link is created in that
directory that points to the original object.
- Select the object's icon.
- Choose Properties from the File menu or from the object's pop-up menu. File
Manager displays the File Properties dialog.
- Make the desired changes:
- To change the file's owner, type the new owner's name into the Owner
Name field.
- To change the file's group, type the new group name into the Group Name field.
- Choose OK.
Notes
- If you give ownership of the file to another user, you may not be able to
change the permissions again unless that user returns ownership to you.
- If you do not have permission to change the properties, some of the controls
in the File Properties dialog are inactive.
- Select the object's icon.
- Choose Properties from the File menu. File Manager displays the File Properties
dialog.
- In the Permissions box, select the permissions for the file or directory's
owner, group, and other:
- Select Read for the users that should be allowed to read the file or
directory.
- Select Write for the users that should be allowed to alter the file or directory.
- Select Execute for the users that should be allowed to execute the file.
- Choose OK.
The object's owner is identified in the Owner Name field. The object's group is
identified in the Group Name field.
Read, write, and execute permission is selected in the Permissions box. The
permissions selected in the Group row indicates the access privileges for any user
belonging to the named group. The permissions selected for the Other row apply to
all other users.
Notes
- If you give ownership of the file to another user, you may not be able to
change the permissions again unless that user returns ownership to you.
- If you do not have permission to change properties, some of the controls in
the File Properties dialog are inactive.
File Manager is like a vehicle that you drive to tour the filesystem on your
computer and other computers on the network. Each File Manager window-also
called a "view"-shows the contents of a single directory.
- Double-click a directory icon.
- Or, select a directory icon, then choose Open In Place from the Actions
menu or from the directory's popup menu. (Open New View opens a new File Manager
window for the directory.)
- Or, double-click a segment of the current path. For example, if the
current directory is
/users/aaron/.vue/types
you can change to the
/users/aaron/
directory by double-clicking the word aaron
- Or, select the path above the icon area, type the directory you want to
view, then press Enter.
- Choose Terminal from the Directory menu.
This opens a Terminal Emulator window with the same current working directory
as the File Manager window.
To close a Terminal window, choose Close from the window menu, or execute the
exit command.
- Using the Actions menu:
- Select the object's icon.
- Choose the action you want to execute from the Actions menu.
- Or, choose the action you want from the object's popup menu.
- Or, double-click the object's icon to invoke its "default" action
(which is the first action listed in the Actions menu).
The Trash Can collects all of the files and directories that you delete.
They are not actually removed from the file system until the trash
is "emptied." You can empty the trash manually, or it is emptied
automatically when you log out of HP VUE.
If you change your mind, and want to restore a file you've put in the
trash, you can restore it if the Trash hasn't been emptied.
The trash control in the Front Panel lets you drop objects to delete
them. Choosing the trash control displays the Trash Can window, which
lists the files and directories currently in the trash.
- Choose the trash control in the Front Panel.
- Or, choose Show Trash from File Manager's File menu.
There is only one Trash Can window, shared by all File Manager windows.
- Drop the object's icon on the trash can in the Front Panel.
- Or, select the object's icon, then choose Delete To Trash from the File menu.
- Or, choose Delete To Trash from the object's popup menu.
- Open the Trash Can.
- Select the object(s) you want to restore in the Trash Can's list.
- Choose Restore from the Trash Can's File menu.
- Close the Trash Can by choosing Close from the File menu.
Restoring an object from the trash returns it to its original location an removes
it from the Trash Can list.
- Open the Trash Can.
- Select the object(s) you want to empty from the trash:
- Select individual objects in the list.
- Or, choose Select All from the File menu.
- Choose Remove from the File menu.
- Close the Trash Can by choosing Close from the File menu.
If there are no objects in the trash, some menu commands are inactive.
Caution
When you remove a file from the trash, it cannot be recovered.
Keeping track of many files can quickly become too much to remember. File
manager helps by providing the ability to search for a file or directory by
name. You can also search for files based on the contents of the file.
- Choose Find from the File menu. File Manager displays the Find dialog.
- Enter the name of the file or directory you want to find into the File Name field.
- If you want the search to include symbolic links, choose On from the Follow
Links options menu. Otherwise, symbolic links are ignored.
- Enter the directory where you want the search to begin into the Search
Directory field. (By default, this field contains the current working directory of
the File Manager view.)
- Choose Start.
File Manager begins searching the Search Directory and its subdirectories for files
that match the name you've given. As matches are found, they are listed in the
Files Found list. You may stop the search at any time by choosing Stop.
Matching Patterns
When you specify a file or directory name, you can include wildcard characters, such
as asterisk (*) and question mark (?). The * matches any string of characters
(including no characters), and ? matches any single character.
Examples:
vue*
Matches all names that begin with the string vue.
*.vf
matches all names that end with the .vf extension.
*.???
matches all names that have a three-character dot extension.
Tips for advanced users
The file name and contents can be specified using the same regular expression
syntax allowed by the find command. (refer to the find man page for more information.)
- Choose Find from the File menu. File Manager displays the Find dialog.
- Enter the string you want to search for into the File Contents field. Case is ignored
for this string-that is, upper- and lower-case letters are equivalent.
- If you want the search to include symbolic links, choose On from the Follow
Links options menu. Otherwise, symbolic links are ignored.
- Enter the directory where you want the search to begin into the Search Directory field.
(By default, this field contains the current working directory of the File Manager view.)
- Choose Start.
File Manager begins searching the Search Directory and its subdirectories for files that
contain the File Contents string. As matches are found, they are listed in the Files Found
list. You may stop the search at any time by choosing Stop.
If you leave the File or Directory Name field empty, File Manager searches every file within
the Search Directory. If you know the name (or a partial name) of the files that contain the
search string, you may be able to speed up the search by also providing a file name
(or pattern) in the File or Directory Name field. File Manager examines only the files
that match the File or Directory Name field.
Tips for advanced users
The file name and contents can be specified using the same regular expression
syntax allowed by the find command. (Refer to the find man page for more information.)
As you become more familiar with File Manager, you may want to change some
settings to better suit your needs or personal preferences. The Preferences dialog
lets you make these changes.
You may also want to alter your File Manager views by specifying which filetypes
you are not interested in seeing. You can hide certain files and directories using
the Filter List.
- Choose Set Preference from the View menu.
- Select the sort order you prefer from the Order box.
- alphabetically sorts all icons alphabetically by name, A-Z (ascending)
or Z-A (descending). Upper-case letters are sorted first.
- By File Type groups icons according to file type. Within each group of similar
types, the icons are sorted alphabetically.
- By Date sorts according to the last time the files were modified, oldest to
youngest (ascending) or youngest to oldest (descending).
- By Size sorts icons by file size, smallest to largest (ascending) or largest to
smallest (descending).
- Select the sort direction, from the Direction box: Ascending or Descending.
- Choose OK.
If you have Placement set to As Placed, icons are sorted only when you choose Clean
Up from the View menu or when you choose Apply in the Preferences dialog. If Placement
is set to Sorted Grid, the icons are sorted each time there's a change to the directory's
contents or when you choose Reread from the Directory menu.
- Choose Clean Up from the View menu.
The Clean Up Command sorts the objects in the current view (according to
the settings in the Set Preferences dialog) and lines them up in a grid pattern.
The settings in other File Manager windows are not affected.
The Clean Up command is inactive if you have the Placement preference set to
Sorted Grid.
- Choose Set Preference from the View menu.
- Select your preferences (Placement, Show, View, Order, and Direction).
- Choose OK.
If you want to view the results before closing the Set Preferences dialog, choose Apply.
- Set the preferences that you want (using Set Preferences and Modify Filter
List in the View menu).
- Choose Save Settings from the View menu. File Manager prompts to verify that
you want the current settings saved.
- Choose OK.
After saving the current preferences, all new File Manager views you open uses the new
preferences and filter list.
- Choose Show Hidden Files from the View menu.
The Show Hidden Files command is a toggle, so to hide the files, choose Show Hidden
Files again.
Hidden files and directories are those whose filetypes are selected in the filter list.
By default, the hidden filetypes are DOT_FILE, DOT_DIR, and CURRENT_DIRECTORY.
- Choose Modify Filter List from the View menu. File Manager displays the
Modify Filter List dialog.
- In the horizontal list of icons, select the icons for the filetypes you want to be hidden.
- Optional: Enter a name pattern into the Filter String field specifying
additional file and directory names to be hidden.
- Choose OK.
If you want to view the results before closing the dialog, choose Apply.
To reset to the default filter list, choose Reset. This resets the default values
but does not apply them until you choose Apply or OK.
Note
The filter list specifies which files are not to be displayed. If you select all filetypes
or enter * into the Filter String field, no files are displayed.